Finally, got example that intriguing~
Source: Docs.microsoft.com: Tutorial: Get started with Windows Communication Foundation applications
I would say this example was designed carefully. The instructions is set to be clear and simple. Naming convention may make attributes ambiguous, and the tutorial designer carefully make minor differences. I encounter many issues and finally decided not to change a word in code, making it easier to distinguish whether it was loss-thread on naming or environment problems. After successfully built, the code is rather clear that how the names work and what is irrelevant.
ex. <base address><<add baseAddress> could be whatever the programmer want. Only the client should comply. Corresponding functionality are defined at <service name> and <endpoint contract>
Service name that client called is the deriving class. The contract set up is the interface.
MS server is just to complicated, communication is count as library, and need a host application to activate it. Undeniably, MS server is powerful to big enterprises, according to what I see during my IT career, Some business entities using Xnix or Mac OS in general, but using MS servers.
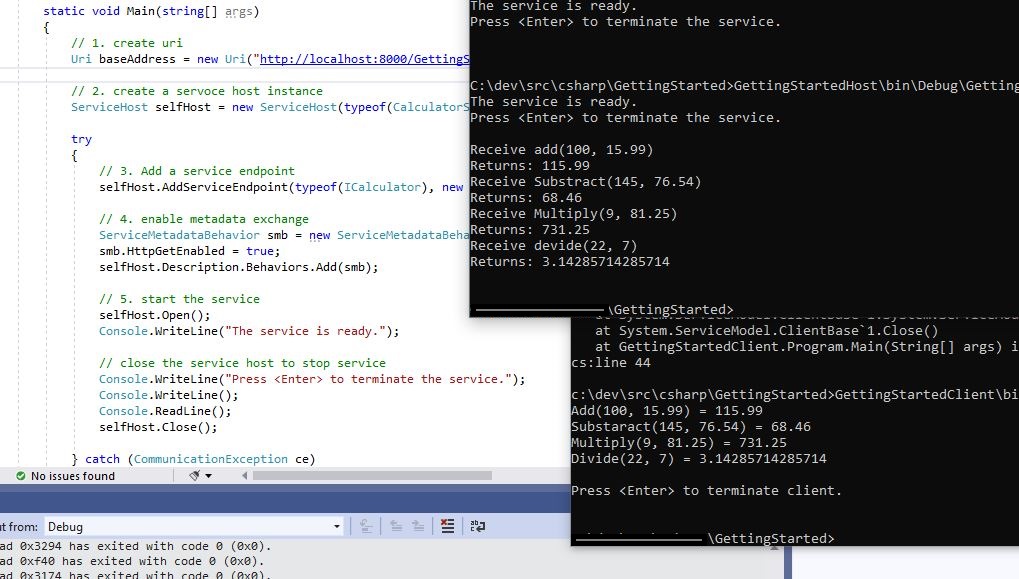
Client side code. Reliable service deserves hard work~
When I create client/server between Linux servers, it was not so complected... Opened a port, bind address, and then listen. Or prepared information that server were listening, and retrieved the result back. Under current Windows framework, so much information required. And how come I never successfully built startup projects provided by docs.Microsoft ....?
Many environment related issues happened when I tried to complete this WCF project. At the end, its so pleasant~~~
Source: Docs.microsoft.com: Tutorial: Get started with Windows Communication Foundation applications
I would say this example was designed carefully. The instructions is set to be clear and simple. Naming convention may make attributes ambiguous, and the tutorial designer carefully make minor differences. I encounter many issues and finally decided not to change a word in code, making it easier to distinguish whether it was loss-thread on naming or environment problems. After successfully built, the code is rather clear that how the names work and what is irrelevant.
ex. <base address><<add baseAddress> could be whatever the programmer want. Only the client should comply. Corresponding functionality are defined at <service name> and <endpoint contract>
Service name that client called is the deriving class. The contract set up is the interface.
MS server is just to complicated, communication is count as library, and need a host application to activate it. Undeniably, MS server is powerful to big enterprises, according to what I see during my IT career, Some business entities using Xnix or Mac OS in general, but using MS servers.
Client side code. Reliable service deserves hard work~
Comments
Post a Comment